Blogging has become a popular way for people to share their thoughts, ideas, and experiences with others. It’s a great way to build an online presence, connect with like-minded individuals, and establish yourself as an authority in your niche. With WordPress, creating a blog has become easier than ever. In this post, we will walk you through the steps to create a blog using WordPress.
Step 1: Choose a Domain Name and Web Hosting
The first step to creating a blog is to choose a domain name and web hosting. A domain name is the address that people will use to access your blog. It should be easy to remember, relevant to your niche, and preferably end with .com, .net, or .org. You can register a domain name from a domain registrar like Namecheap, GoDaddy, or Google Domains.
Web hosting is a service that allows your blog to be accessible on the internet. It’s important to choose a reliable web hosting provider that offers fast loading times, excellent uptime, and 24/7 support. Some popular web hosting providers include Bluehost, HostGator, and SiteGround.
Step 2: Install WordPress
Once you have chosen a web hosting provider, the next step is to install WordPress. Most web hosting providers offer a one-click installation for WordPress. If not, you can download WordPress from the official website and install it manually. Here’s how to install WordPress using the one-click installation:
- Log in to your web hosting account and go to your control panel.
- Look for the WordPress icon and click on it.
- Follow the installation wizard and enter your domain name, admin username, and password.
- Click on the Install button and wait for the installation to complete.
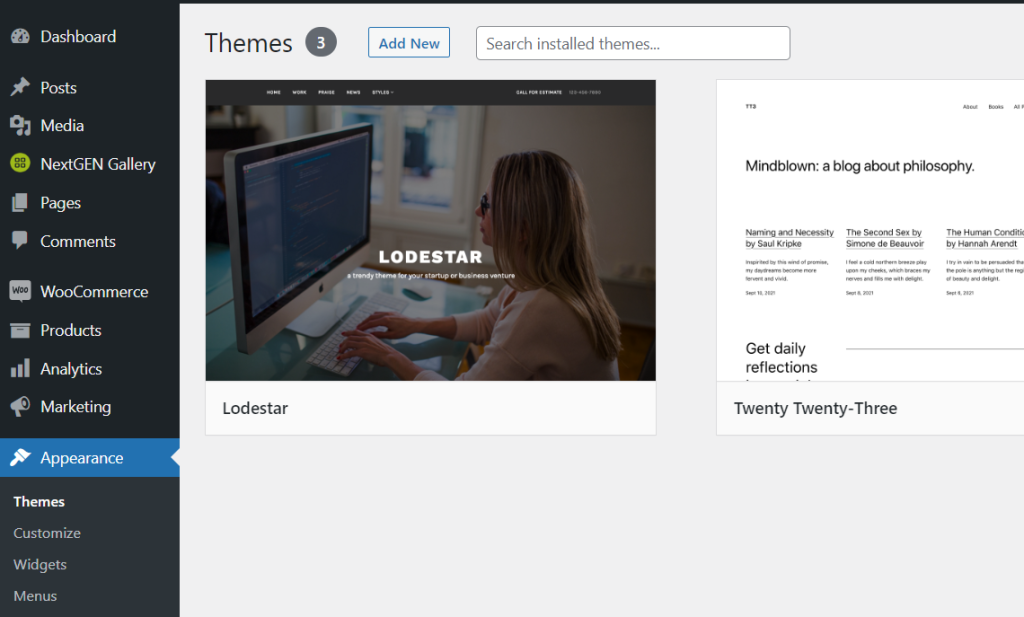
Step 3: Choose a Theme
After installing WordPress, you can choose a theme for your blog. A theme is a design template that determines the appearance of your blog. WordPress offers thousands of free and paid themes that you can choose from. You can browse the themes in the WordPress repository or purchase a premium theme from a third-party website. Here’s how to choose a theme:
- Go to Appearance > Themes in your WordPress dashboard.
- Click on the Add New button to browse the themes.
- Use the search bar to find a theme that matches your niche or criteria.
- Click on the Install button to install the theme.
- Click on the Activate button to activate the theme.
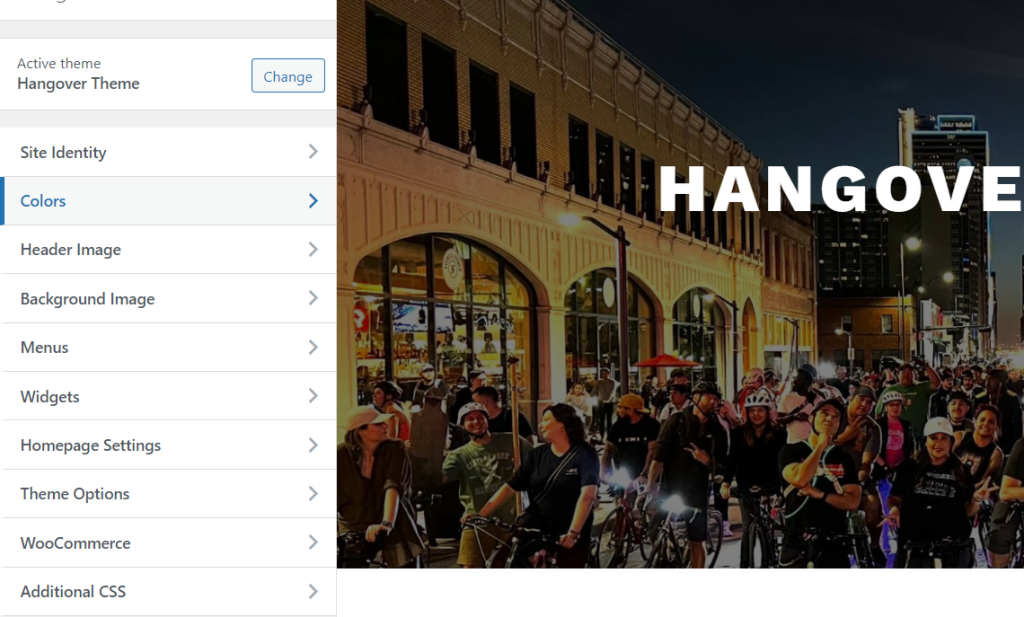
Step 4: Customize Your Theme
Once you have chosen a theme, you can customize it to your liking. You can change the header, footer, colors, fonts, and more. WordPress offers a visual editor that allows you to customize your theme without any coding knowledge. Here’s how to customize your theme:
- Go to Appearance > Customize in your WordPress dashboard.
- Use the left sidebar to navigate to different sections of your theme.
- Use the controls on the right side to make changes to your theme.
- Preview your changes in real-time by clicking on the Preview button.
- Click on the Save & Publish button to save your changes.
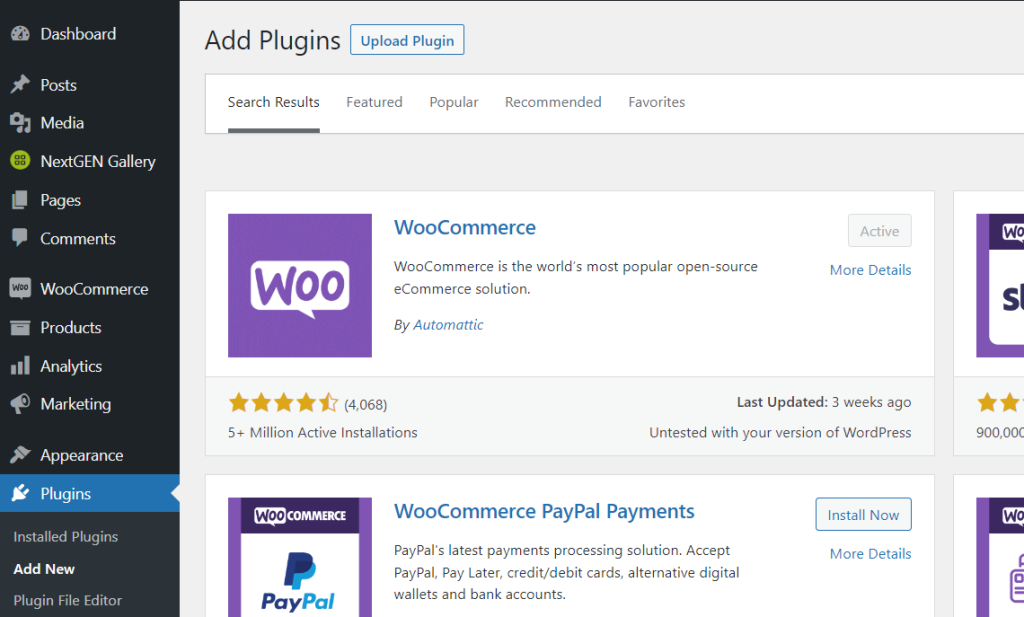
Step 5: Install Plugins
Plugins are software components that add functionality to your blog. There are thousands of free and paid plugins available in the WordPress repository. Some essential plugins for a blog include Yoast SEO for search engine optimization, Jetpack for website security and performance, and Akismet for spam protection. Here’s how to install plugins:
- Go to Plugins > Add New in your WordPress dashboard.
- Use the search bar to find a plugin that you need.
- Click on the Install Now button to install the plugin.
- Click on the Activate button to activate the plugin.
- Configure the plugin settings by following the instructions.
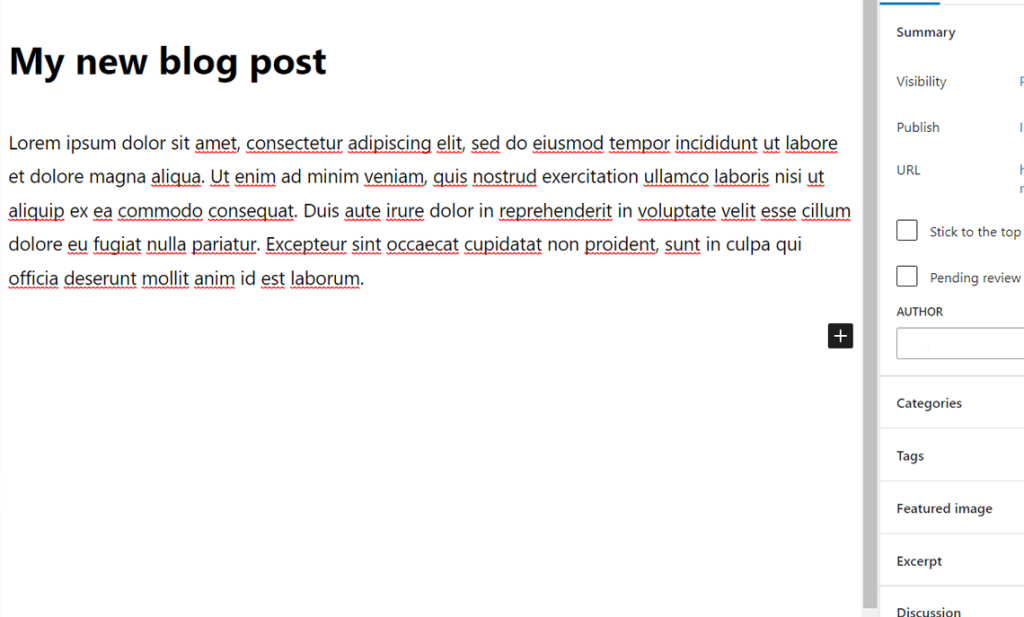
Step 6: Create Content
After customizing your theme and installing plugins, the next step is to create content for your blog. Content is the heart of your blog, and it’s what will attract readers and keep them engaged. You can create different types of content, including blog posts, videos, podcasts, and infographics. Here’s how to create a blog post:
- Go to Posts > Add New in your WordPress dashboard.
- Enter a title for your blog post.
- Use the visual editor to write your content.
- Add images, videos, or other media to your post.
- Use headings, paragraphs, and bullet points to organize your content.
- Use tags and categories to help readers find your content.
- Preview your post by clicking on the Preview button.
- Click on the Publish button to publish your post.
Step 7: Promote Your Blog
After publishing your blog post, the next step is to promote your blog. Promoting your blog will help you reach a wider audience and attract more readers. You can promote your blog using social media, email marketing, guest posting, and search engine optimization. Here are some tips for promoting your blog:
- Share your blog post on social media platforms like Twitter, Facebook, and LinkedIn.
- Send an email newsletter to your subscribers with a link to your blog post.
- Guest post on other blogs in your niche and include a link back to your blog.
- Optimize your blog for search engines by using keywords, meta descriptions, and alt tags.
- Participate in online communities related to your niche and share your blog post.
Conclusion
Creating a blog using WordPress is easy and straightforward. By following these steps, you can create a professional-looking blog that attracts readers and establishes your online presence. Remember to choose a domain name and web hosting, install WordPress, choose a theme, customize your theme, install plugins, create content, and promote your blog. Happy blogging!
If you need assistance with your WordPress development or hosting, consider reaching out to us. Our team of experts can help you set up your WordPress site, customize your theme, install plugins, and create content that attracts readers and grows your online presence.